When your iron door is installed, inspecting its quality within 24–48 hours is essential to ensure proper functionality, durability, and security. Here’s what to check:
- Frame Alignment: Use a level and measuring tape to confirm the frame is straight, square, and properly secured with the correct fasteners.
- Door Operation: Open and close the door to test for smooth movement, consistent gaps, and no sticking or scraping.
- Hardware: Inspect hinges, screws, and locks for tightness, alignment, and smooth operation. Ensure the deadbolt aligns with the strike plate.
- Paint and Finish: Look for even paint coverage, no chips or bubbles, and smooth welded joints to prevent rust.
- Glass and Sealing: Check glass panels for cracks, proper fit, and safety certifications. Ensure weatherstripping is intact and there are no air leaks.
- Rust Protection: Verify the door’s protective coatings, like zinc galvanization and powder coating, are consistent and cover vulnerable areas.
- Documentation: Keep records of measurements, photos, and warranty information for future reference.
A detailed inspection helps catch issues early, saving time and money on future repairs. For long-term care, clean the door regularly, inspect for damage seasonally, and address any scratches or rust promptly.
Frame Installation and Alignment
The frame serves as the backbone of your iron door, directly influencing its functionality, durability, and security. Getting the alignment right is key to ensuring smooth operation and long-term reliability.
Check Frame Alignment
To start, gather a 4-foot or longer spirit level, a 25-foot measuring tape, and a carpenter’s square. These tools will help you confirm that the frame is level, plumb, and square.
Begin by placing the level along the top of the frame. If the bubble isn’t centered, the frame is misaligned. Next, check both vertical sides by positioning the level against the jambs. A centered bubble here confirms the frame’s vertical alignment.
For the corners, use a carpenter’s square to ensure they form perfect 90-degree angles. To double-check, measure the diagonals of the frame. If the measurements match, the frame is square. Industry guidelines suggest addressing any misalignment greater than 1/16 inch per foot.
Inspect Frame Attachment Points
A properly secured frame is essential for stability. Carefully examine each point where the frame is attached to the wall. Look for the correct fasteners: lag bolts for wood framing or masonry anchors for brick or concrete. Ensure these fasteners are tight, evenly spaced, and free from rust or damage. Corrosion can indicate moisture problems or subpar materials.
Take note of the shimming – a technique used to fill gaps between the frame and the wall. Shims help maintain alignment and prevent the frame from shifting. If you notice gaps or if the frame flexes when lightly pressed, the attachment might not be secure enough.
“Our experienced team ensures your door, window, or gate is installed with precision and care, for a seamless, secure fit.” – Forever Iron Doors Carolina
Verify Door Dimensions
The frame’s width must match your wall’s construction. In the U.S., standard wall stud configurations typically require a frame width of 6 inches for 2×4 walls and 8 inches for 2×6 walls. These measurements include the lumber, drywall, and exterior sheathing.
Measure the frame at the top, middle, and bottom. Consistent measurements across these points indicate a properly installed frame. If the numbers vary, it could mean the frame is twisted or incorrectly sized for the wall thickness.
Also, check that the frame opening matches your door’s dimensions. The gap around the door should be uniform – usually 1/8 inch on the sides and top. Uneven gaps can lead to operational issues or compromise weatherproofing.
At Forever Iron Doors Carolina, installers follow detailed procedures, ensuring the frame is level, securely fastened with approved hardware, and shimmed correctly throughout. This thorough approach helps catch potential issues early, avoiding costly fixes later.
For added peace of mind, document your work. Take clear, dated photos of the frame, attachment points, and any concerns. Keep a record of measurements and note any deviations. These records can be invaluable for warranties or future maintenance.
Next, move on to testing the door’s operation and hardware functionality.
Door Operation and Hardware Testing
Once you’ve confirmed the frame’s accuracy, it’s time to focus on how the door moves. This step helps uncover issues that might not be obvious during a static inspection but become noticeable when the door is in motion.
Test Door Swing
Open and close the door slowly to check for any sticking, scraping, or resistance. A well-crafted iron door should glide smoothly throughout its entire range of motion without catching on the frame or threshold.
Pay close attention to the gaps between the door and the frame as it swings. These gaps should stay consistent. If you notice them widening or narrowing, it could signal alignment issues that need fixing right away.
Try moving the door at different speeds. While slow operation might not reveal all problems, opening and closing the door quickly can sometimes highlight issues like uneven movement or binding.
“We want to make sure your home’s framing is structurally sound and your new iron door is level and operating smoothly.” – Forever Iron Doors Carolina
While testing, watch for any signs of stress on the door itself. The door should stay rigid, without flexing or bowing. Pay extra attention to areas around hardware cutouts, as these spots are more prone to stress. Cracks, deformation, or any signs of metal fatigue in these areas are red flags that need immediate attention.
Examine Hinges and Alignment
Hinges play a critical role in maintaining the door’s stability. Start by visually inspecting each hinge to ensure it aligns properly with both the door and the frame. The hinge leaves should sit flush against their mounting surfaces without gaps or tilting. Listen for any unusual noises like squeaking or grinding, which could indicate a lubrication issue or misalignment.
Check each hinge screw with a screwdriver to ensure they’re securely fastened. They shouldn’t feel loose, and there shouldn’t be any movement if you press on the hinge.
For a more detailed inspection, you can temporarily remove hinge pins one at a time. This allows you to verify proper alignment and ensures the door can be reinstalled without binding. When the pin is back in place, the door should hang naturally, with its corners aligned and seams closed during operation.
Test Locking Mechanisms
The security of your iron door relies heavily on the proper functioning of its locks and hardware. Engage and disengage each deadbolt to ensure it operates smoothly without requiring excessive force. Be alert for grinding or clicking noises, as these could indicate internal issues.
Check that the deadbolt aligns perfectly with the strike plate in the frame. When you engage the lock, the bolt should slide fully into the strike plate without catching on the edges. Misalignment here can compromise the lock’s effectiveness and overall security.
Next, test all handles and levers. They should operate smoothly, returning to their neutral position without wobbling or looseness. Ensure they are securely attached, with no signs of loosening at the mounting points.
Inspect the tapped holes in the frame where the lock hardware is secured. These holes should hold the hardware firmly without signs of stripping. Stripped holes can lead to lock failure and require immediate repair.
Lastly, confirm that all hardware reinforcements, such as strike plates, corner clips, and mounting screws, are firmly in place. Look for any signs of metal fatigue, cracks, or deformation in these critical areas.
Document any issues you encounter. Take photos of problem areas and note specific symptoms like unusual sounds, binding, or misalignment. This information can be valuable for warranty claims or future repairs.
Paint and Finish Quality
Once you’ve tested the door’s operation and hardware, it’s time to evaluate its finish for both appearance and durability. The finish on an iron door plays a crucial role in protecting it from rust and weather damage. A well-applied finish not only boosts the door’s visual appeal but also ensures it can endure years of exposure to the elements, safeguarding its longevity and security.
Check Paint Application
Begin by inspecting the paint coverage across the entire surface of the door. The paint should appear smooth and even, with no signs of drips, runs, or exposed metal. Consistent coloring across all areas is key to a professional finish.
Examine the surface closely for any bubbles, peeling, or chipping, as these flaws can signal poor application or inadequate surface preparation. To ensure the finish is smooth, gently run a soft cloth over the surface.
Pay extra attention to corners, edges, and intricate details, as these areas are often where imperfections show up first. Uneven textures or visible brush marks in these spots may indicate sloppy finishing techniques.
Also, check for uniform color saturation. Any patches with lighter or thinner paint could point to issues with coverage or improper mixing during application. Be sure to look at welded joints to confirm they meet the same finish standards as the rest of the door.
Examine Welded Areas
Welded joints deserve special scrutiny because they are prone to moisture intrusion and rust if not properly finished. High-quality welds should be ground flush with the surrounding metal and seamlessly coated to blend with the rest of the door.
Inspect all seams for rough edges, sharp spots, or unfinished areas. A well-crafted door will have weld marks smoothed out before primer and paint are applied, leaving no visible signs of the joints.
Pay close attention to any rough or uncoated weld marks, as these can become weak points for moisture entry and lead to corrosion. The paint over welded areas should be just as smooth and consistent as on the rest of the door.
Additionally, check around hardware mounting points and decorative elements. Any exposed metal or inconsistent finish in these areas should be corrected to prevent rust. Document any noticeable finish discrepancies, and consider taking photos for reference. Next, confirm that the door’s protective coating system is built to last under various weather conditions.
Check Protective Coatings
A high-quality iron door finish typically involves a multi-layer protective coating system. This process often starts with sandblasting to clean and prepare the metal, followed by a zinc-rich primer to inhibit rust, and multiple layers of durable exterior paint. In some cases, up to seven coats may be applied, especially in humid climates, to ensure long-term durability.
Ask your installer for documentation outlining the specific coating process used on your door. If your contract specifies a powder-coated finish, confirm that it was applied. Powder coating offers superior resistance to chipping, fading, and weather damage compared to traditional liquid paints.
Look for manufacturer labels or paperwork indicating compliance with industry standards for architectural metal coatings. If you live in a coastal or humid area, verify that the protective system is designed to handle high moisture levels, ensuring your door’s performance over time. Also, confirm that areas like strike plates and mounting brackets received the same protective treatment as the main door surfaces.
If you notice any thin or uneven coating, make a note for potential touch-ups.
“From timeless matte black to rich bronze, charcoal, or custom hues, our powder-coated finishes are designed to withstand the elements while enhancing your door’s curb appeal. All finishes are applied using a multi-step process for lasting durability and fade resistance.” – Forever Iron Doors Carolina
Glass Installation and Sealing
Once the protective coatings are applied, it’s time to inspect the glass panels and seals. Why is this so important? Properly installed and sealed glass can cut your yearly heating and cooling costs by 10–20%. On the flip side, poorly sealed glass can let as much as 30% of your home’s energy escape through doors and windows. This step ensures your door not only looks great but also performs efficiently.
Check Glass Condition
Begin by carefully inspecting each glass panel for any cracks, chips, scratches, or other visible defects. The glass should fit snugly within the door frame, without any gaps or movement when you press on it lightly. Pay close attention to the edges – irregularities here might point to improper installation.
Look for a manufacturer’s stamp or etching in one corner of each panel. This mark confirms the glass meets U.S. safety standards, such as ANSI Z97.1 or CPSC 16 CFR 1201. Typically, the stamp includes the manufacturer’s name and may also display a date code. These safety certifications are non-negotiable – double-check that they’re present.
For decorative or switchable glass, consistency is key. Check that all panels have an even appearance, free from distortions or uneven coloring. Switchable glass, in particular, needs precise installation to avoid stress points that could lead to cracks. Make sure these panels are firmly seated in their frames.
If tempered glass is used, confirm that it’s securely mounted with no rattling or looseness. Tempered glass is about four times stronger than regular glass, so its proper installation is crucial for safety.
Inspect Seals and Weatherstripping
Next, turn your attention to the sealing system. Examine the weatherstripping around the glass panels to ensure it’s firmly attached and continuous, with no visible gaps. The sealing material should look clean and intact – no cracks, peeling, or signs of wear.
Check that molding, caulk, and weatherstripping are applied evenly. There shouldn’t be any bubbles, gaps, or excess material that might signal rushed work.
Forever Iron Doors Carolina applies molding and caulk with precision to ensure a seamless fit.
Corners and joints deserve extra scrutiny. These areas are most prone to gaps that can compromise the seal. The weatherstripping should compress slightly when the door closes but shouldn’t appear overly squished or damaged.
For custom glass installations, confirm that the seals are designed for the specific glass thickness. If the glass is switchable, make sure any electrical components are well-protected from potential moisture damage.
Test for Air Leaks
Finally, check for air leaks. Run your hand along the edges of the glass to feel for any drafts. Focus on areas where the glass meets the frame and where the weatherstripping should provide a tight seal. A proper seal doesn’t just prevent drafts – it also keeps out dust, pollen, and even insects.
If possible, test during various weather conditions, as temperature changes can make leaks easier to detect.
Forever Iron Doors Carolina offers low‑E and insulated glass options that depend on tight sealing to maximize energy efficiency and climate control.
If you feel any air movement, document the problem areas with photos and have your installer address them immediately. Air and water leaks can lead to moisture damage or even rust inside your door’s structure, so prompt fixes are essential.
Lastly, ask your installer about the sealing materials they’ve used and their expected lifespan. High-quality exterior-grade silicone and weatherstripping should last for several years with proper care. Knowing these details can make future maintenance a breeze.
Weather Protection and Rust Prevention
The longevity of your iron door depends heavily on its ability to resist rust and withstand weather conditions from the very start. Without proper rust prevention, even high-quality wrought iron can deteriorate quickly. A well-protected door not only retains its appearance but also its structural strength for years. On the other hand, poor protection can lead to visible rust in just a few years, especially in harsh climates.
Once you’ve checked the door’s finish and glass seals, it’s crucial to assess its weatherproofing to guard against corrosion.
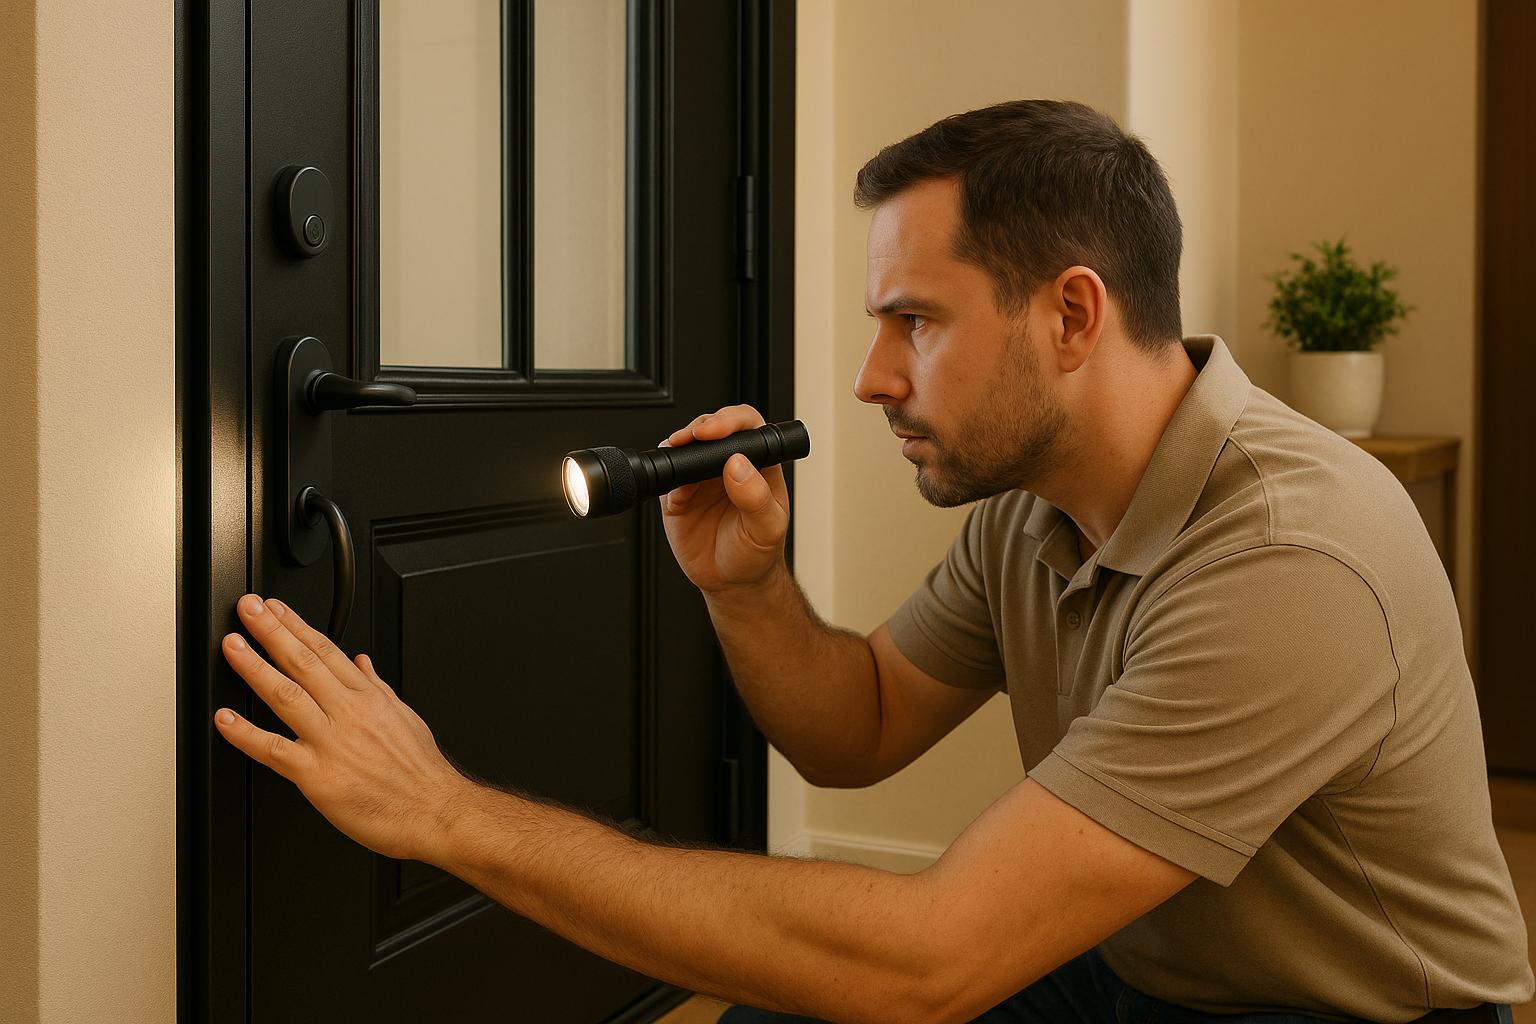
Check Rust Protection Coatings
Start by examining the zinc coating beneath the door’s paint. Most high-quality wrought iron doors are galvanized, meaning they have a zinc layer that serves as the first line of defense against rust. You can confirm this coating by reviewing the installation documents or manufacturer specifications. Pay close attention to unpainted edges or hardware cutouts, which should also show consistent protective coverage.
Use a flashlight to inspect areas that are harder to see, like the bottom edge, hinge recesses, and corner joints. These spots should have even paint coverage with no chips, bubbles, or thin areas. Exposed metal or inconsistencies in the finish could become rust-prone over time. Welded sections are particularly vulnerable because the heat from fabrication can weaken protective layers, so ensure these areas are seamlessly coated. If you spot any issues, take photos and report them to your installer.
“From timeless matte black to rich bronze, charcoal, or custom hues, our powder-coated finishes are designed to withstand the elements while enhancing your door’s curb appeal. All finishes are applied using a multi-step process for lasting durability and fade resistance.” – Forever Iron Doors Carolina
Additionally, check if the door complies with ANSI/SDI A250.4 standards or similar certifications. Manufacturer warranties often include details about rust protection, which can reassure you that proper coatings were applied.
Check Drainage and Moisture Resistance
Water is one of the biggest threats to iron doors, so proper drainage is critical. Inspect the bottom of the door and its frame for drainage holes, ensuring they’re clear of debris.
To test drainage, pour water onto the threshold. It should flow away immediately without pooling. The door should sit slightly above the threshold to encourage runoff. If water collects at the base or inside the frame, this signals a drainage issue that needs fixing. Look for rust stains at the base of the door, as these are signs of prolonged moisture contact. The bottom rail, being closest to the ground, is especially vulnerable to water buildup during heavy rain.
These steps are essential for maintaining the door’s durability and work hand-in-hand with its protective finish.
Understand Natural Patina Benefits
When it comes to weather protection, the door’s natural defenses also play a role. In humid or coastal areas, iron doors often develop a natural patina over time. This thin, stable oxide layer forms as the iron reacts with oxygen and moisture. While the patina acts as a shield against further corrosion, it should complement – not replace – the door’s primary protective coatings. Keep an eye on its development to ensure it doesn’t turn into damaging rust.
For homeowners near the coast, combining quality coatings with regular patina care is key to keeping doors rust-free. Applying a marine-grade wax or protective coating every 3–6 months can help counteract the effects of salt air. Clean the door regularly with mild soap and water to remove salt, dirt, and debris that could compromise the coatings or the patina. Address any paint chips or scratches promptly with a rust-inhibiting primer and exterior-grade paint. For best results, inspect your door at least twice a year, increasing the frequency during storm seasons.
Documentation and Final Check
Once you’ve reviewed the weather protection and coatings, it’s time to finalize your project by organizing and documenting everything about your door. When you work with Forever Iron Doors Carolina for your custom wrought iron door, you’ll receive detailed records confirming that every aspect of the installation aligns with your specifications. This documentation not only wraps up the installation process but also serves as a critical reference for any future warranty claims or maintenance needs.
Review and Collect Documentation
Your installer should provide essential paperwork verifying that the door was installed according to the agreed specifications. Be sure to collect the signed installation contract, warranty papers, and the approved CAD drawings. These technical drawings are particularly important – they outline precise measurements, hardware placement, and any custom features that were part of your design.
Additionally, request the installer’s completion checklist and quality control report. These documents confirm that every step of the installation process was properly followed, including frame alignment, hardware attachment, and operational testing. Make sure you also receive product data sheets for the door, glass, hardware, and finishes. These sheets contain technical specs and warranty details for each component.
According to ANSI/SDI A250.4-2024 standards, steel doors undergo rigorous testing during manufacturing, with cycles ranging from 250,000 to 1,000,000 to ensure durability. Quality installers should provide inspection or test reports that verify these standards, including swing or twist test results that confirm the door’s structural integrity. These reports complement earlier inspections of the frame, hardware, and finish quality.
If anything is missing or incomplete, contact your installer right away. Reputable companies understand the importance of thorough documentation and should provide any missing materials promptly.
Verify Custom Features
Take a close look at your installed door and compare it to your original order confirmation and CAD drawings. Start by checking the glass specifications – if you requested frosted glass, impact-resistant glass, or decorative designs, make sure these match what was installed. For features like Low‑E or insulated glass, confirm their presence through the product documentation, as they might not be immediately noticeable.
Next, inspect the finish color and application method. Whether you chose matte black, bronze, charcoal, or a custom color, the finish should match your approved sample. Look for signs of a multi-step powder-coating process, which enhances the door’s durability.
Don’t forget the hardware elements. Examine the pulls, handles, hinges, and locks to ensure the style and finish – whether satin nickel, oil-rubbed bronze, or matte black – are consistent across all components. Even small details like screw finishes and hinge pin colors should complement the overall design.
Double-check that every custom feature – glass type, finish, and hardware – matches what you approved in the original drawings. For instance, if you specified custom impact-resistant glass, the installed glass must meet that requirement.
Document Door Condition
After installation, take high-resolution photos of the door, frame, and all details. Capture images of the door both open and closed, along with close-ups of custom features, hardware, glass panels, and any seams or welds. Pay extra attention to areas prone to wear or damage, like the bottom rail, hinge areas, and lock mechanisms.
Don’t stop at the door itself – photograph the frame, threshold, and weatherstripping to document their initial condition. These photos create a baseline for future comparisons and can be crucial if you need to file a warranty claim or insurance report later on.
Store all photos digitally, using clear file names that include the installation date. Keep a comprehensive file with the installation date, the installer’s contact information, the door model, serial number, and all related documents. If you found any issues during your inspection, note how they were resolved. Also, include warranty terms and their expiration dates for easy access.
This meticulous approach not only protects your investment but also ensures clear communication with your installer. Professional companies value customers who keep detailed records, as it helps maintain a shared commitment to quality and avoids potential misunderstandings during future maintenance or warranty claims.
Conclusion
Taking the time to conduct a detailed post-installation inspection ensures your investment is protected and sets the stage for years of dependable performance. By carefully reviewing key elements – like frame alignment, hardware functionality, paint quality, and weatherproofing – you establish a solid foundation for lasting durability, security, and visual appeal.
This thorough process also helps identify potential problems before they turn into costly repairs. Considering that over 80% of failures are linked to improper installation or inadequate inspection, it’s essential to confirm smooth operation, secure locking mechanisms, and effective sealing. These steps can save you from future headaches and expenses.
Working with professional installers adds another layer of quality assurance. Companies like Forever Iron Doors Carolina bring expertise to every project, with certified installers and master carpenters delivering precision fits, strong structural support, and expert finishing. As one happy customer, Matt V., shared: “Cory and his install team were fantastic and did a fantastic job” on his iron door installation.
Don’t forget to document the process. High-resolution photos and warranty records can be invaluable for future maintenance or warranty claims. With proper upkeep, your door will retain its quality and charm for decades.
This inspection isn’t just a one-time task – it’s the start of ongoing care. Schedule annual maintenance to address minor issues before they worsen, and promptly repair any chips or scratches to prevent corrosion. A thorough inspection today ensures your door remains secure, beautiful, and a lasting asset for years to come.
FAQs
How can I check if the frame of my newly installed iron door is properly aligned?
To make sure your iron door’s frame is properly aligned, start with a quick visual check. Look closely for any gaps between the door and its frame when the door is shut – these gaps could signal a misalignment. Then, open and close the door several times. If it sticks, scrapes, or doesn’t move smoothly, it’s a sign the frame might need some adjustment.
For a more precise check, grab a level. Place it along the vertical sides and across the top of the frame to see if everything is straight and even. If anything seems off, it’s best to reach out to your installer right away. Fixing alignment issues early on will help maintain your door’s functionality and longevity.
How can I tell if there are problems with my iron door’s hardware or locks?
To spot potential problems with your iron door’s hardware or locking mechanisms, begin by testing the locks to see if they work smoothly without sticking or jamming. A misaligned lock and strike plate can also signal an issue. Don’t forget to check the hinges – look for wear, rust, or any unusual noises when opening or closing the door.
If you come across any of these problems, it’s important to address them quickly to keep your door secure and in good working condition. Simple maintenance steps, like tightening loose screws and applying lubricant to moving parts, can go a long way in preventing more serious damage over time.
Why should I document the installation process and keep records of my iron door’s condition?
Keeping a record of your iron door’s installation and condition isn’t just a good habit – it’s an essential step for several reasons. First, it provides proof that the door was installed correctly, which can be critical if you ever need to make a warranty claim or schedule maintenance. Second, these records allow you to monitor the door’s condition over time, helping you catch signs of wear or damage early before they become bigger issues.
Having this documentation on hand can also be incredibly helpful if you need to involve a professional for repairs or adjustments. By staying organized and proactive, you can help ensure your wrought iron door remains sturdy, secure, and visually appealing for years to come.
Related Blog Posts
- Ultimate Guide to Custom Iron Door Installation
- How to Design an Iron Door for Style and Security
- Custom Iron Doors for Arched Entryways
- Why Regular Maintenance Extends Iron Door Lifespan